The last step connects your headset to the server you set up. MR Stash uses device login - the app sends a pairing request, you approve it once from the Stash web UI, and the app receives a key it uses from then on. No keys to copy by hand. This assumes you've finished adding the plugins.
You'll need: the MR Stash app installed on your headset, your Stash server's address and sidecar port, and access to the Stash web UI to approve the device.
How device login works
When the app connects, it sends an onboarding request carrying its unique device identifier to the sidecar, which registers it as pending. You approve that pending device from the device auth panel in the Stash web UI. On approval, the sidecar returns an API key that the app holds in memory and uses for all communication with Stash.
The key is fetched fresh on every launch or re-authentication, so it's never written to disk on the headset. Approve the device once and later launches re-authenticate automatically, and disconnect from either side with a single click.
Start pairing from your headset
Launch MR Stash on your headset. At login you're offered a mode select - choose device pairing to begin the handshake.
- On the login screen, pick Device pairing as your mode.
- On the host details screen, enter your Stash server's address and the sidecar port, then confirm.
- If the connection is established, the app shows a pairing code generated by the sidecar and waits for you to approve it.
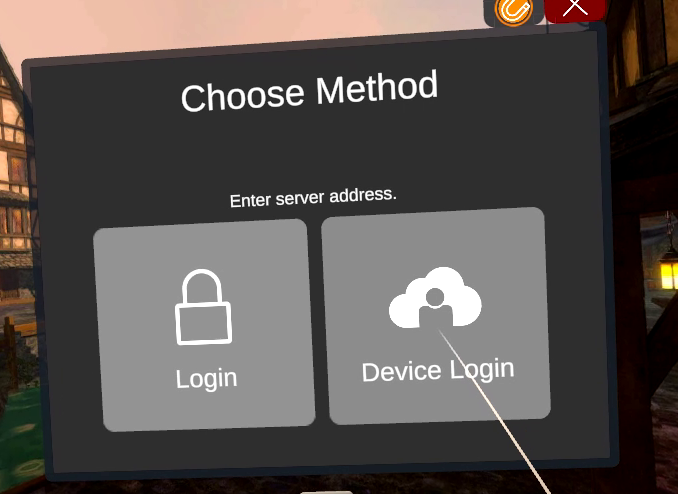
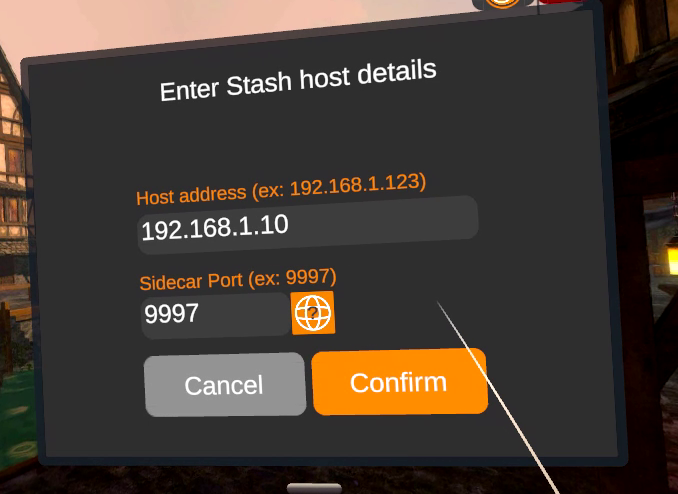
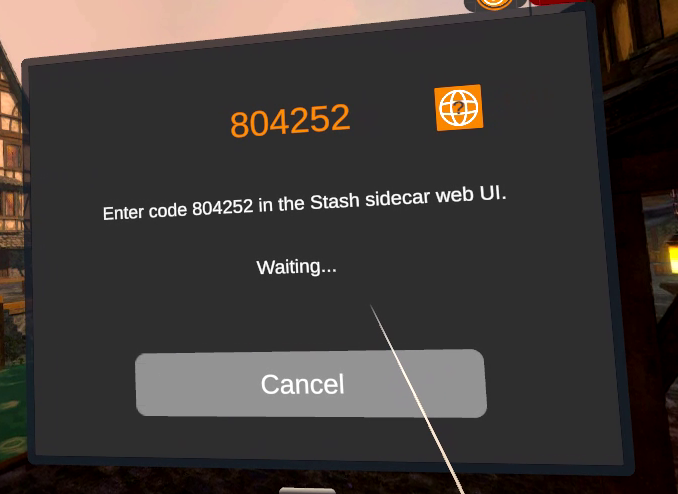
Use the sidecar port (9997 by default from Guide 2), not the Stash web UI port (9999) - for example http://192.168.1.50:9997. Leave the app on the code screen while you approve it on the next step.
Approve the device in Stash
Now switch to the Stash web UI on your computer or phone - any browser on the same network:
- Open Stash at http://your-stash-host:9999 and log in if prompted.
- Click the device auth icon in the top navigation bar - green means the sidecar is connected and ready.
- The modal shows the connecting device - MR Stash device and its code. Confirm the code matches the one on your headset, then accept (or reject if it doesn't match).

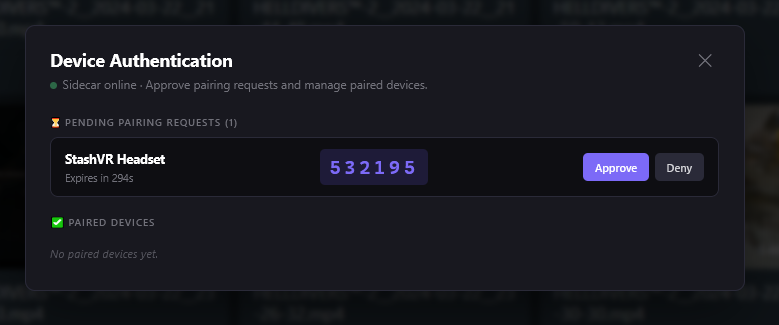
Matching the code is your check that you're approving your headset and not someone else's request. If the icon isn't green or the icon is missing, revisit the plugin verify step in Guide 2.
Confirm & start streaming
The moment you accept, the sidecar hands the app its API key and the headset finishes connecting:
- The app moves off the waiting screen into your library browser.
- Pick a title - it streams straight into the mixed-reality scene.
That's the whole setup. Your library is now browsable in mixed reality, and future launches re-authenticate on their own - no need to approve again unless you reset the device or revoke it in Stash.
Troubleshooting
The app can't reach the server. Confirm you used the sidecar port (9997), that it's published in compose, and that the headset is on the same network. A browser test against http://your-stash-host:9997 isolates network issues from app issues.
No device auth icon in Stash. The companion plugin isn't enabled, or the page needs a reload. Re-check Guide 2 and refresh.
The device never shows up to approve. Make sure the container was recreated (up -d, not just restarted) so the sidecar is running, then re-send the request from the app.
Pairing succeeds but streaming fails. Confirm Stash itself can play the title outside MR Stash, and that the key the sidecar returned still matches a valid Stash key.